If you find a single-mode question with more parts than you want, you can create a copy of the question to edit. This newly copied question is identical to the original, except you are the owner and can edit it for your needs.
-
If needed, open your question in the Question
Editor.
Some questions are not searchable because of their Permission settings.
If Do this You know the question ID or name - In the search box at the top of the page, select Question.
- Type the question name or ID and press Enter.
You own the question - Click Questions > My Questions.
- Click the question name.
You organize your questions in folders - Click Assignments > Folders and navigate to the folder with the question.
- Click the question name.
You want to use advanced search - Click Questions > Search Questions.
- Enter the search criteria you want to use.
To view only your questions, click me next to Author.
- Click Search.
- If you own the question, click Edit next
to your question.
If you do not own the question, click View, then click Open in Editor under Previewer Tools.
-
Click Duplicate for the
question you want to edit.
Important
Some questions cannot be duplicated.
Some features of textbook questions are intentionally not available after duplication. These features are generally textbook-specific, and include eBook links and tutorials, simulations, and instructional materials associated with the textbook.
The new question opens in the Question Editor, and shows that it is a duplicated question. -
In the Name field, enter a unique
question name and click Save.
You can quickly create a unique question name by adding a unique identifier, such as your initials, to the original question name.For example, if you create a duplicate of RogaCalc2 1.1.002 and add GAM- as the unique identifier, the new name and QID would be GAM-RogaCalc2 1.1.002. (2661089).The question is saved with its new name and assigned a new QID.Note Make a note of your question's new name and QID displayed at the top of the editor. This will make it easier when you want to add the question to an assignment.
- Optional:
Click Test/Preview to see your new
question.
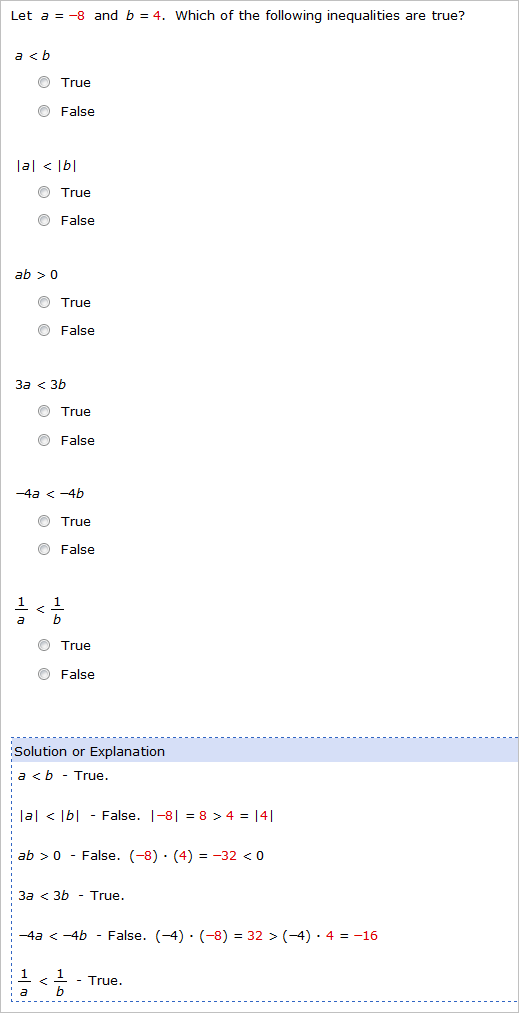
Note At any point in the editing process you can test to see how your changes affect the question. You do not need to save your changes before testing.For example, GAM-RogaCalc2 1.1.002. (2661089) is identical to the original question:
-
From the Question,
Answer, and Solution fields of
the editor, delete the parts of the question you want to remove.
You can resize the Question, Answer, and Solution fields using the horizontal
 or vertical
  resize buttons.
-
In the Question
field, delete the parts you want to remove. Ensure you delete the
associated <_> because these are the answer
blanks for the question parts.
To prevent display errors, be sure all the remaining
<div>or<blockquote>tags have corresponding</div>or</blockquote>tags.In the example, the highlighted text shows the Question part of GAM-RogaCalc2 1.1.002. that will be deleted: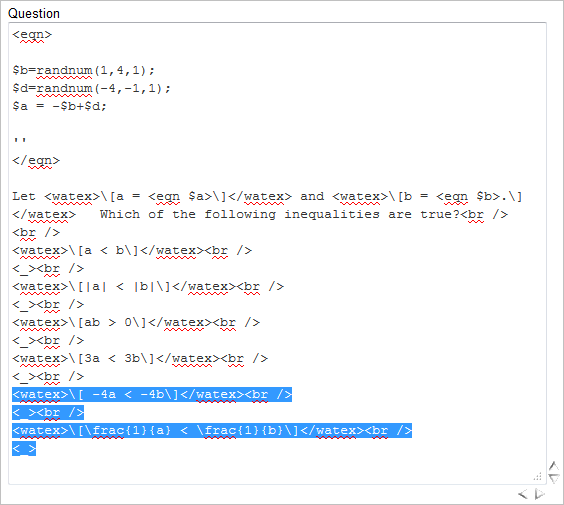
-
In the Answer field,
delete the parts of the answer that correspond to the
Question field parts and answer blanks you
deleted. This step is important because it directly affects how the
question is scored in your assignment.
Important Each line of the Answer field usually begins with the
EQNtag and corresponds to one answer blank in the order they are displayed in the question. Make sure that you delete the entire line and there are no extra carriage returns at the end. Unless the deleted line is the lastEQNline, make sure theEQNtag is at the beginning of the next line.In the example, the highlighted text shows the Answer field part of GAM-RogaCalc2 1.1.002. that must be deleted because it corresponds with the deleted Question field part in Step a: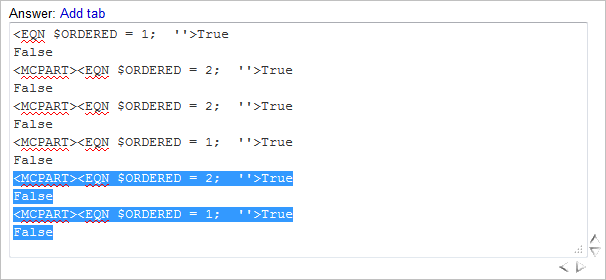
-
If the question has a solution, remove any
text in the Solution field that corresponds to
the deleted parts in the Question and
Answer fields.
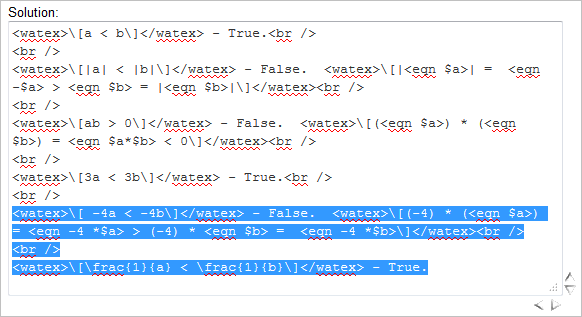
In the example, the highlighted text shows the Solution field part of GAM-RogaCalc2 1.1.002. that must be deleted because it corresponds with the deleted Question and Answer fields' parts in steps (a) and (b):
-
In the Question
field, delete the parts you want to remove. Ensure you delete the
associated <_> because these are the answer
blanks for the question parts.
-
If necessary, add
<br/>to insert line breaks in the question or solution field display. -
Click Redisplay.
The top of the Display section shows any Perl syntax or other errors in the Question and Answer sections. Correct any errors, and then continue. For more information, see Perl Variables and Functions.
-
Click Test/Preview to see how
your question will be displayed to students and check that all answer blanks are
grading correctly. Be sure to test your answer blanks by entering both correct
and incorrect answers.
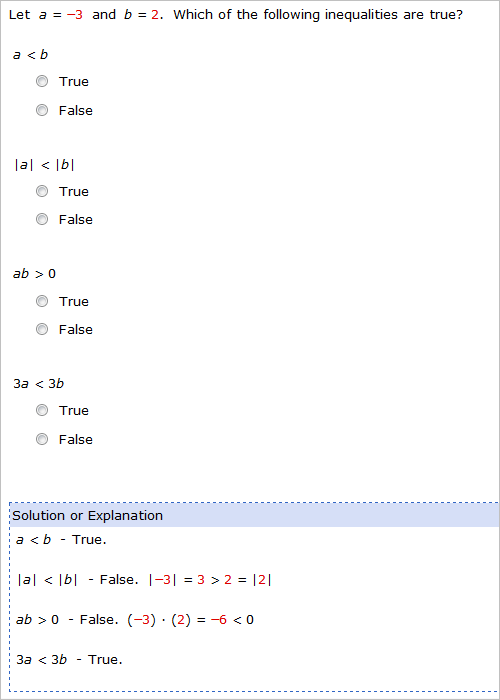
In the example, this is the edited version of GAM-RogaCalc2 1.1.002.:
-
To help other instructors find your question in search
results, edit the following fields in the Additional
Information section.
If Additional Information is hidden, click Show Additional Information.
- Keywords
- Add a comma-separated list of keywords that describe the question.
- Classification
- Click Classification and select one or more disciplines that relate to the question, then click Update.
- Permission
- Select a permission. If you created permission groups, they will
display in the permission list.
For more information on permission settings and permission groups, see Share Questions With Other Instructors and Manage Permission Groups.
- Usable/Draft
- Select Usable if the question is ready to be included in assignments or Draft if it is still being edited. Draft does not prevent the question from being included in your assignment; however, the question will not be available to anyone you chose to share it with until it is marked Usable.
- Comment
- Add a note about how your question differs from the original, WebAssign-coded question.
- Discipline
- Select one or more disciplines to which the question applies.
In the example, the Additional Information section for GAM-RogaCalc2 1.1.002. looks like this: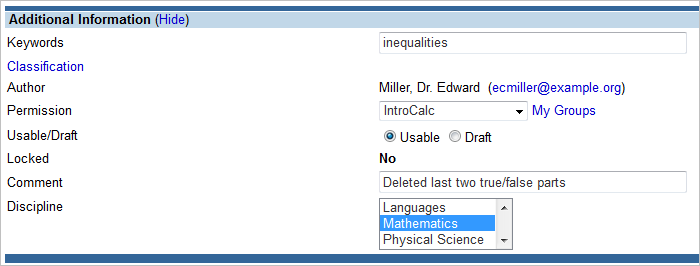
- When the question works how you want, click Save.