
Module 8 – Magnetic Induction – Instructions
INTRODUCTION
Magnetic Induction means to induce electrons to move—creating an electric current—through a circuit using a magnetic field. The magnetic field is indicated by the letter B; it is measured in units of tesla. In this experiment you will explore what does and does not create (induce) a current in a coil of wires.LEARNING OUTCOMES (FROM SYLLABUS)
-
•Define and analyze the concepts such as the following: velocity, acceleration, force, inertia, mass, work, energy (kinetic, potential, etc.) momentum (linear and angular), gravity, tides, power, pressure, density, temperature, thermal expansion, heat, specific heat capacity, waves, sound, electric charge, current, magnetism, electromagnetic waves (including light), photons, and radioactivity.
-
•Discuss the various types of motion, Newton's Laws (including his Universal Law of Gravitation), the conservation laws of physics, the laws of electricity (e.g. Coulomb's and Ohm's Laws) and magnetism. The properties of waves (viz. sound and electromagnetic, including light) and the basic principles of atomic and nuclear physics and quantum theory.
-
•Interpret the results of simple experiments and demonstrations of physical principles.
EXPERIMENT SIMULATION
Use this Experiment Simulation to conduct the experiment according to the instructions below. Follow all instructions explicitly.WORKSHEET
Please print the worksheet for this experiment. You will need this sheet to record your data.
PART I: HORIZONTAL MOVEMENT
Step 1: Set-up
a
Open the magnetic induction simulation.
b
Select "Begin".
c
You should see the image below.
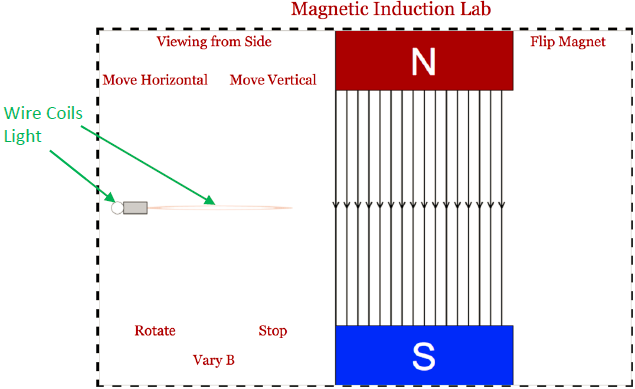
Figure 1
Step 2: Horizontal Movement—From the Side
a
Click on Move Horizontal and watch the light carefully as the coil of wires moves from left to right. The light will go on twice and off twice.
b
Explain what was happening with the coil when the light was on and when it was off.
Step 3: Horizontal Movement—From Above
a
Click Stop to halt the simulation.
b
Click on Viewing from Side. This will change the view to Viewing from Above.
c
Resume the simulation (select Move Horizontal) and allow the light to move through the magnetic field.
d
Describe what was happening with the coil when the light was on and when it was off.
Step 4: Horizontal Movement—From Above, Rotated
a
When the coil returns to the far left again, click Stop.
b
Click Rotate and allow the coil to rotate 90° and then Stop its rotation.
c
Viewing from above, the coil should look like a thin line (see image below); viewing from the side, the coil should look like a full circle.
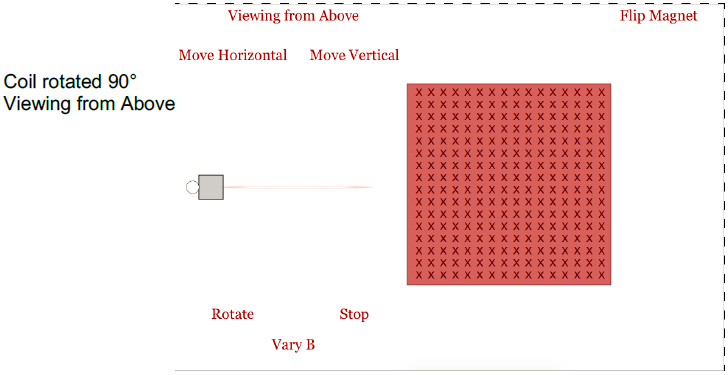
Figure 2
d
Select Move Horizontal again and watch as the coil moves through the field.
e
What is different about the light as the coil moves through the field in this orientation? What about this orientation makes it different?
PART II: VERTICAL MOVEMENT
Step 1: Set-up
a
Move your coil into the magnetic field, but Stop it before the light enters the field, as shown in the picture below.
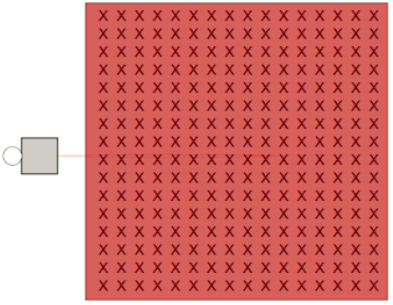
Figure 3
b
Change your perspective to a side view (Viewing from Side).
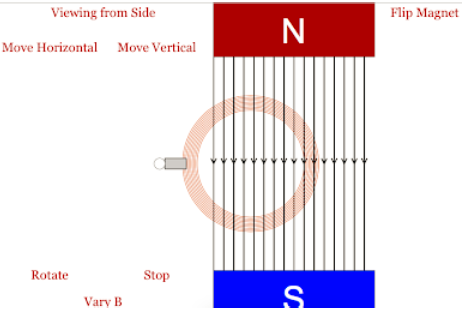
Figure 4
Step 2: Vertical Movement—From the Side
a
Move the coil vertically (Move Vertical)
b
Describe what happens with the light as the coil moves.
Step 3: Vertical Movement—From Above
a
Stop the vertical motion.
b
Move the coil horizontally (Move Horizontal) until all the coil is out of the magnetic field.
c
Stop the motion of the coil.
d
Rotate the coil another 90° so that it is now viewed edge on when Viewing from Side.
e
Move the coil horizontally (Move Horizontal) and then Stop it when most of the coil is in the magnetic field but the light is not (see image below).
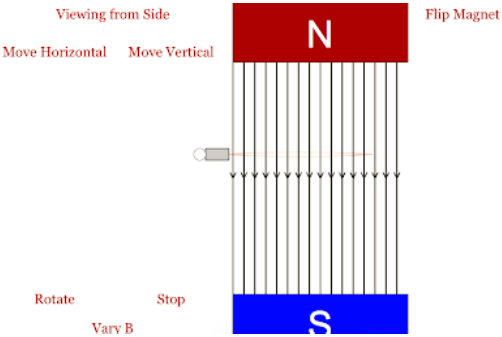
Figure 5
f
Now move the coil vertically (Move Vertical)
g
Describe what happens with the light as the coil moves.
PART III: ROTATION
Step 1: Set-up
a
Stop the coil in the location and orientation shown below (same as Part II, Step 3).
b
Viewing from Side; coils viewed edge-on.
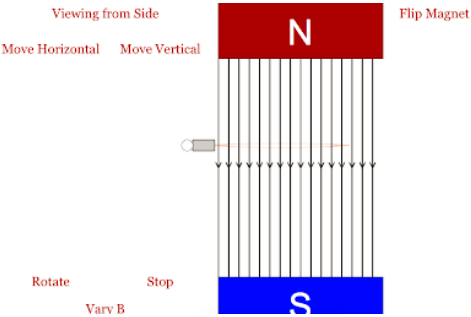
Figure 6
Step 2: Rotation—In the Field
a
Rotate the coil. Allow it to make at least one complete rotation.
b
Describe what happens to the light during this rotation.
Step 3: Rotation—Outside the Field
a
Move Horizontal to remove the coil from the field completely.
b
Allow the coil to Rotate again.
c
Describe what happens to the light during this rotation.
PART IV: MAGNETIC FIELD
Step 1: Set-up
a
Stop the coil in the location and orientation shown below (same as Part II, Step 3).
b
Viewing from Side; coils viewed edge-on.
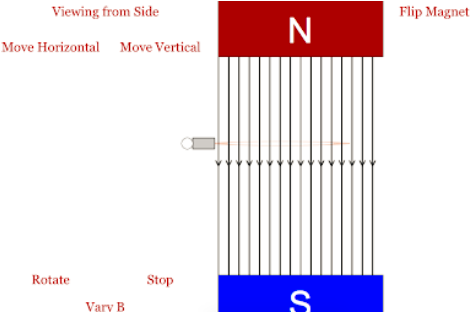
Figure 7
Step 2: Magnetic Field—Strength
a
Click on Vary B.
b
Describe the light during this period.
c
Stop B from Varying.
Step 3: Magnetic Field—Flip Poles
a
Click on Flip Magnet several times in rapid succession.
b
Describe the light during this period.
Step 4: Magnetic Field—Strength, Rotated
a
Rotate the coils 90° to look like the picture below.
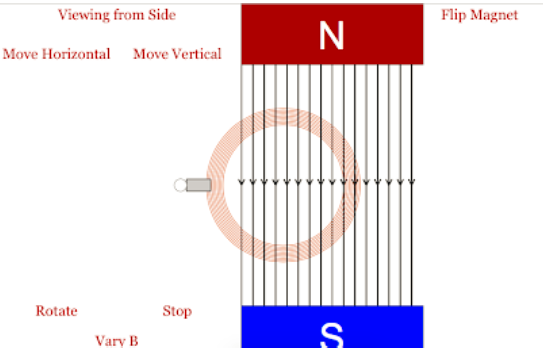
Figure 8
b
Click on Vary B.
c
Describe the light at this time.
Step 5: Magnetic Field—Flip Poles, Rotated
a
Stop B from Varying.
b
Click on flip magnet several times in rapid succession.
c
Describe the light at this time.
PART V: PARTIAL ROTATION
Step 1: Set-up
a
Stop the coil in the location and orientation shown below.
b
Viewing from Side; coils partially rotated (about 45°).
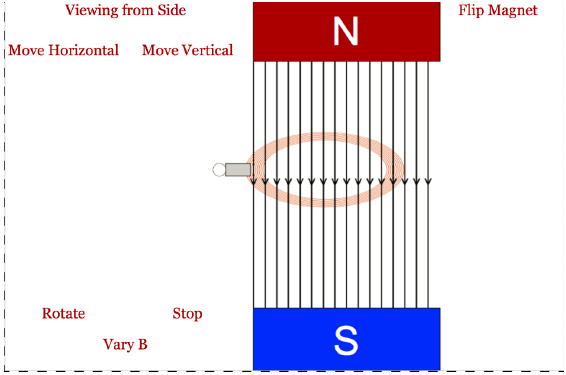
Figure 9
Step 2: Partial Rotation—Strength
c
Click on Vary B.
d
Describe the light during this period on your worksheet.
e
Stop B from Varying.
Step 3: Partial Rotation—Flip Poles
f
Click on Flip Magnet several times in rapid succession.
g
Describe the light during this period.