Measurements
Introduction
Physics is a quantitative, experimental science that relies heavily on the ability to perform accurate, precise measurements. In this experiment, the basic techniques for making measurements and for analyzing data will be introduced. The physical characteristics of length, mass, volume, and density will be measured.Theory
In measuring physical quantities, it is important to use the proper measuring instruments. Often the degree of precision desired for a particular measurement determines the type of equipment that should be used. For measuring linear dimensions such as length, width, or height, there are two types of common instruments available: the straight-edged ruler and the caliper. The caliper consists of two jaws, one fixed and one movable, used to determine the distances between two surfaces or to measure the diameters of small objects.
Note: The measurement error associated with each device is normally about half of the smallest dimension that the instrument is capable of measuring.
The Digital Caliper

Figure 1: Digital caliper
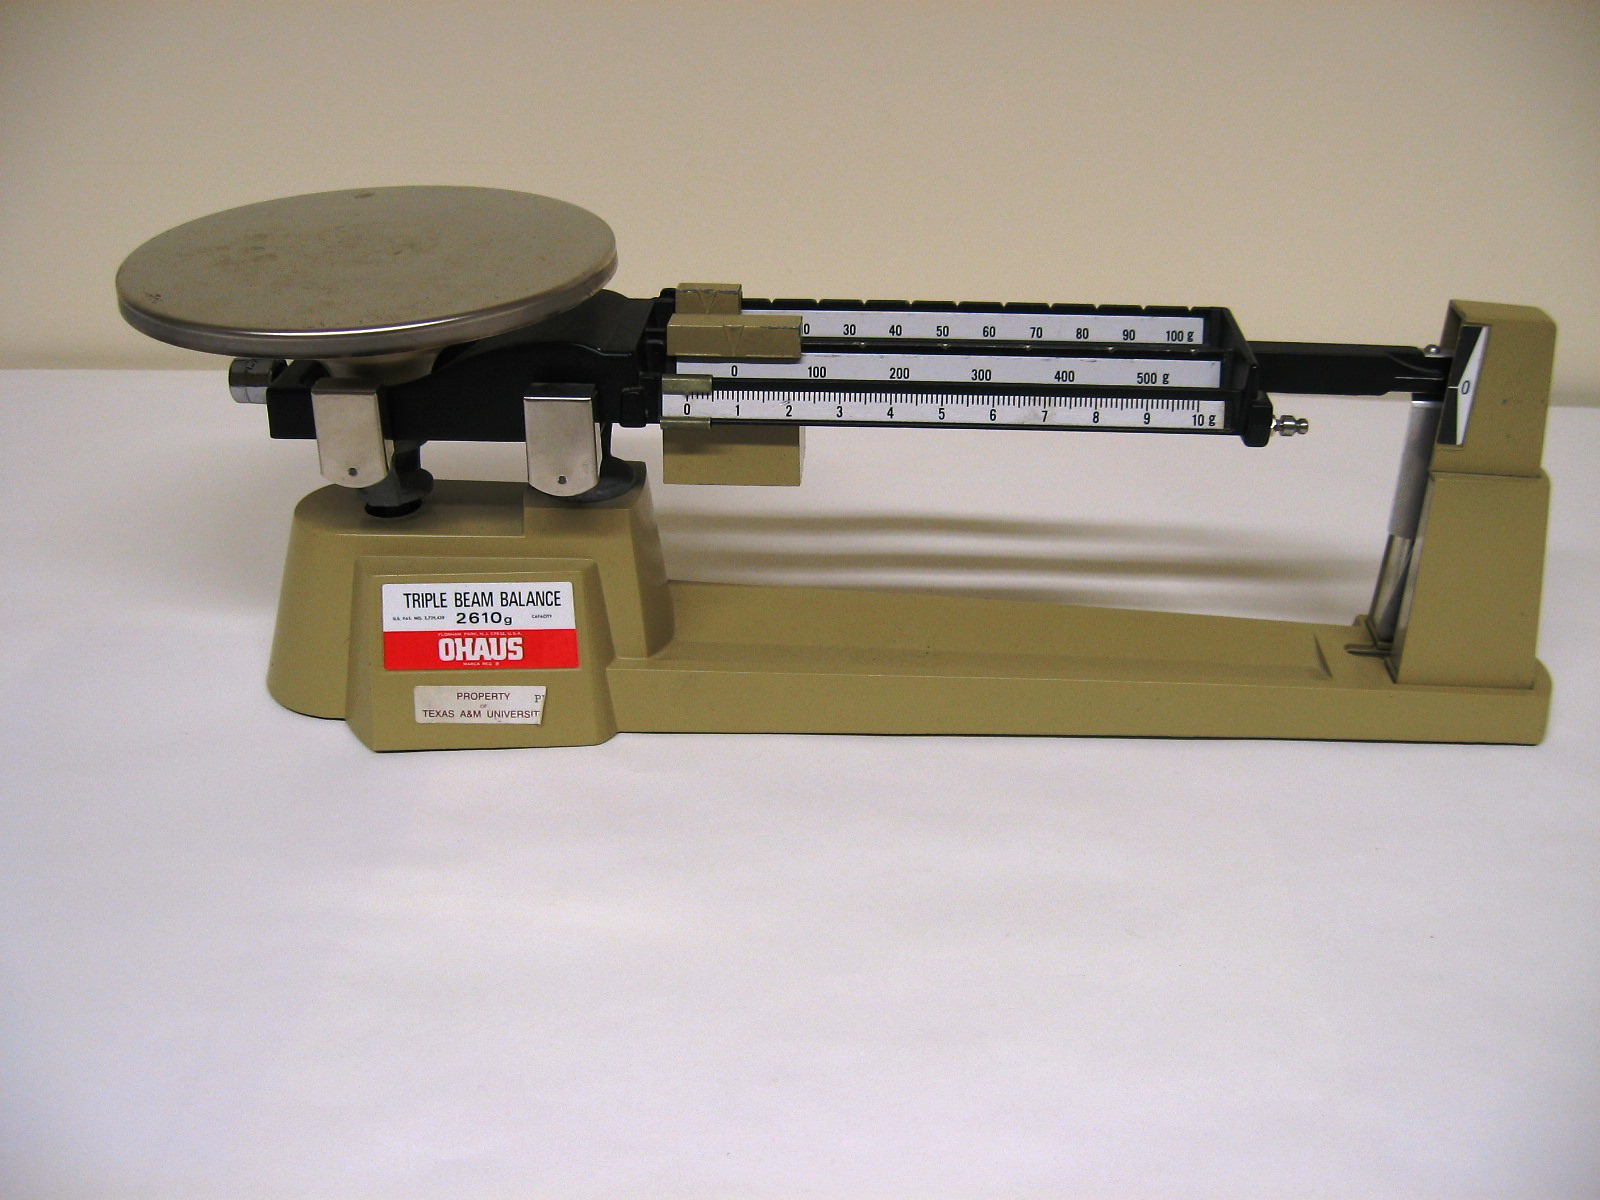
Triple Beam Balance

Figure 2: Triple beam balance
Volume and Density
From the basic quantities of length and mass, many other characteristics of the objects can be determined. For example, once the dimensions of an object are known, then the volume can be calculated. For a sphere the volume is The volume of a hollow cylinder of length L with an inner radius of rin and an outer radius of rout is For liquids, which have no set shape, the quantity of interest is not a linear dimension but is instead the volume. One device used to directly measure the volume of a liquid is the graduated cylinder. For a cylindrical container, the height a liquid rises to can be used to measure the volume of the liquid since the height of a cylinder is directly proportional to its volume. Thus the scale on the outside of the cylinder is graduated in units of volume, permitting a direct measurement of the volume of the liquid in the container. From measurements of the volume and the mass of an object, the density of the composing material can be calculated. Often used to identify an unknown substance, density is defined as the mass per unit volume of the material:Apparatus
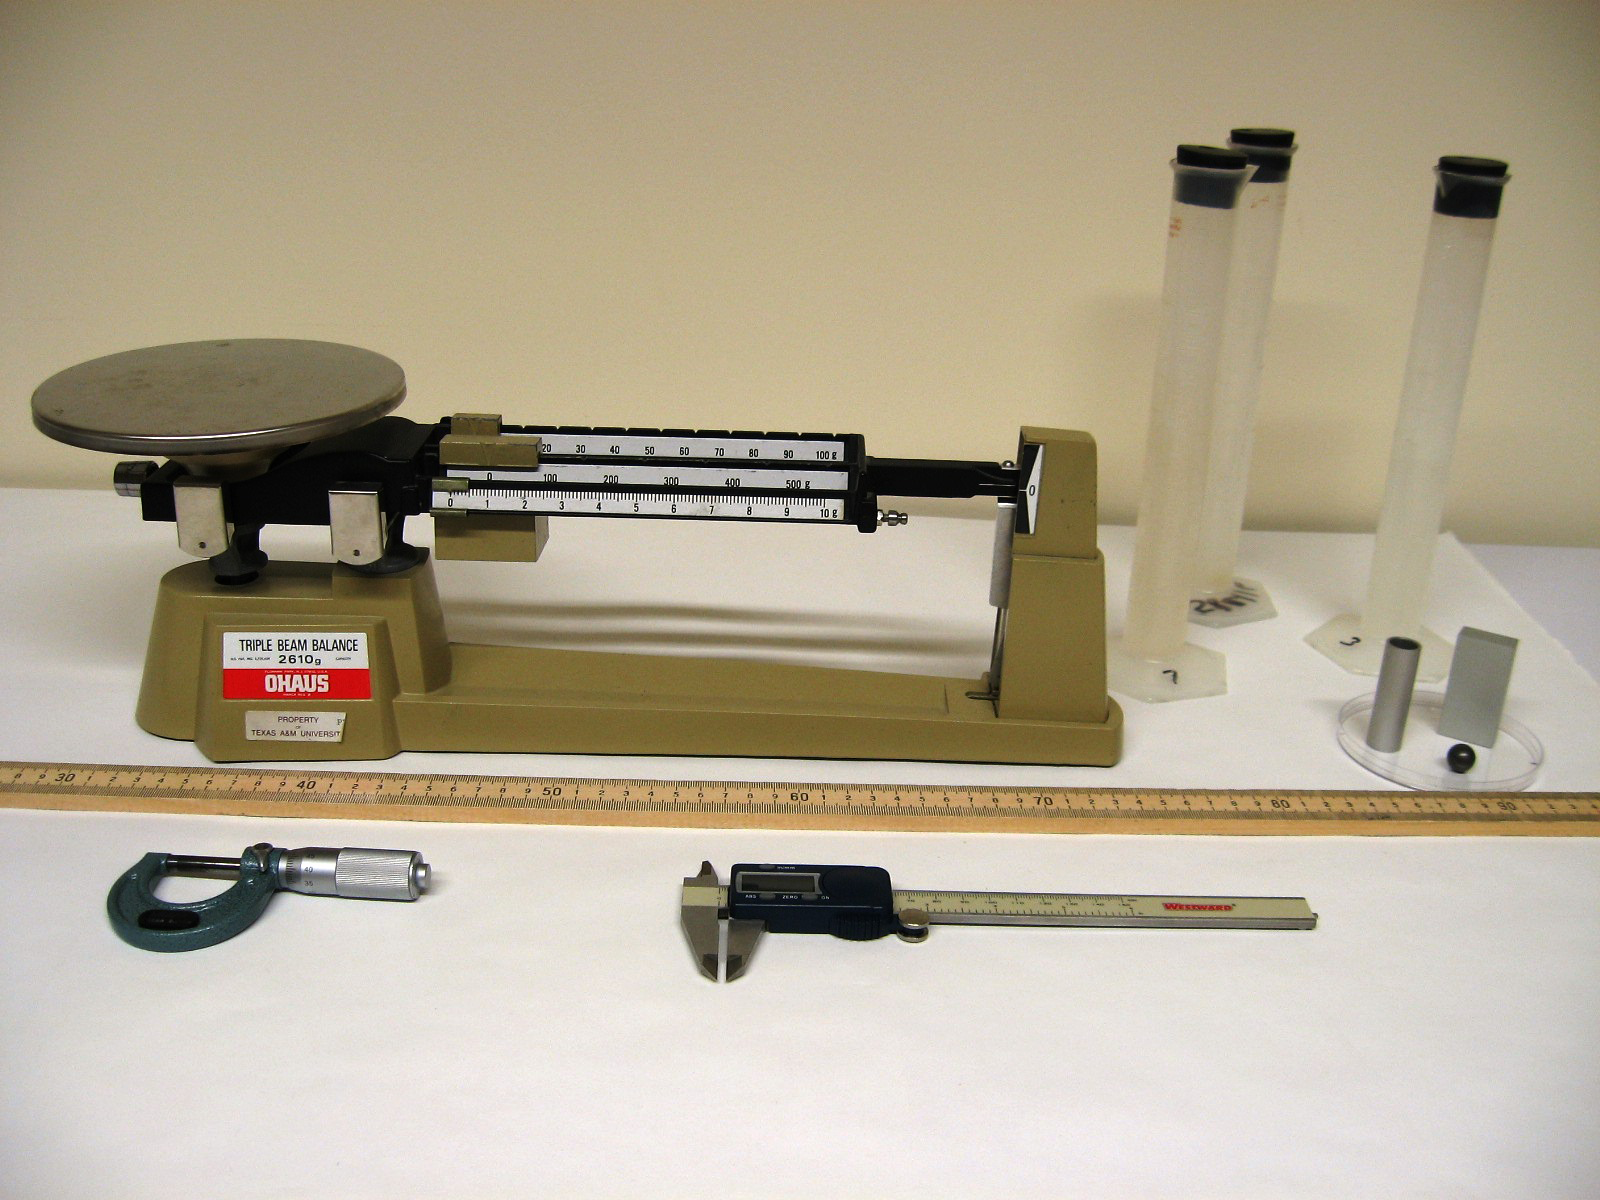
- Meterstick
- Digital caliper
- Triple beam balance
- Aluminum block
- Aluminum cylinder
- Steel ball
- Graduated cylinders (filled with liquids)

Figure 3: Equipment used in this lab.
Objective
The objective of this laboratory is to familiarize you with the concepts of measurement and measurement errors and how they influence your ability to infer a particular conclusion based on these measurements.Procedure
Before coming to lab think about and write out steps for the uncertainty for the
volume and density of the cylinder found in the calculation section. This way during
the lab you can just apply the equations.
A: Measurements
1
Measure the dimensions of the tabletop with the meterstick. When measuring a distance using a meterstick, care should be taken to avoid errors caused by using the worn ends of the ruler. Place the meterstick on the object so that the two edges of the surface being measured fall at arbitrary points, not at the ends of the meterstick. The length of the object is then determined by reading the position of the surface edges on the meterstick and subtracting the smallest value from the largest value. The meterstick should be placed on its edge such that the marks of the scale divisions are perpendicular to the object being measured; this helps eliminate error due to parallax.
Record the meterstick readings to the nearest tenth of a millimeter (or 0.01 cm), carefully estimating the last digit. Estimate the uncertainty for each reading (the smallest division of the meterstick is 0.1 cm, so the uncertainty for each reading would be one-half of this, or 0.05 cm). Calculate the length of each dimension of the tabletop. Using the propagation of errors (see Appendix C), determine the uncertainty associated with the values for each dimension of the tabletop.
NOTE: you should begin entering your data into the Web Assign lab report at this point. Please make a copy of this information on your worksheet in case you need to resubmit this information later.
2
Place the jaws of the digital caliper in contact with each other and zero the scale (be sure the jaws are clean and free from dust or grit).
Note the letter designation on your aluminum block. Now measure and record, in millimeters, the linear dimensions of the aluminum block using the digital caliper.
3
Next, note the letter designation for the aluminum cylinder that you will work with next. Measure and record, in inches, the length and the inner diameter of the aluminum cylinder. Next make 8 measurements of the outer diameter of the cylinder at the following places on the cylinder: at the top and rotated 90 degrees from the first measurements, then 1/3 down the cylinder at 0 and 90 degrees; 2/3 down the cylinder for two measurements, and lastly at the bottom in these same two orientations. Record these measurements in Table 2 for use later.
4
Next, select the steel ball at your lab table for measurement. Place the jaws of the digital caliper in contact with each other and once again zero the readout. Measure and record, in millimeters, the diameter of the steel ball with the caliper in 8 different orientations. Enter this data in Table 2.
5
Using the triple beam balance, measure and record the masses of the aluminum block, the aluminum cylinder, and the steel ball. Enter this data in Table 3.
6
Note the letter designation for each of your liquid samples, then measure and record the mass of each of the graduated cylinders containing the unknown liquids. Measure and record the mass of an empty graduated cylinder. Record the mass of the liquid in each container by calculating the difference between the two measurements in Table 4.
7
Record the volume in milliliters of each of the unknown liquids using the scale on the graduated cylinder. Convert these values into units of cm using the relationship 1 ml = 1 cm3.
Record this data in Table 5.
B: Calculations
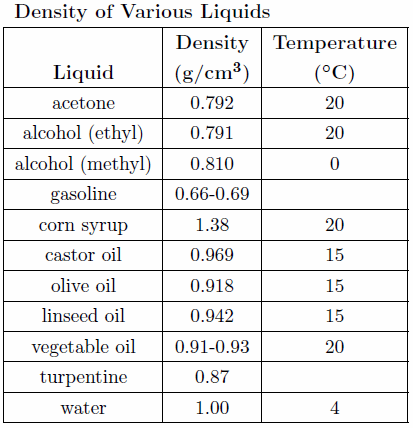
When doing the calculations in this lab (and all subsequent labs) pay strict attention to the rules governing significant figures described in Appendix A. The result for each calculation should include the proper units and an estimate of the experimental uncertainty where appropriate formulas used in the calculations should be clearly indicated. A useful table to use in determining the unknown liquid in the cylinders is shown below in Table 1.
Table 1
1
a. Compute the surface area of the tabletop.
b. Find the uncertainty in the surface area using the propagation of errors described in Appendix C.
c. What is the percent uncertainty (ΔSA/SA × 100%) for the surface area?
2
Compute the volume and the uncertainty in the volume for the aluminum block. What is the percent uncertainty for the volume?
3
Enter the data that you recorded on the diameter of the cylinder into an Excel spreadsheet to find the average outer diameter and its uncertainty, then use equation (2) V = πL
rout2 − rin2
.
to calculate the volume of the hollow cylinder.
 |
 |
4
Now calculate the density of the aluminum cylinder and the error on your measurement. Does your measurement agree with the known value for the density of aluminum?
5
Now using the measurements of the radius of the steel ball, enter them into an Excel spreadsheet to find the average radius and its error. Using this data, compute the volume (and its uncertainty) for the steel ball using equation (1)V =
πr3.
.
| 4 |
| 3 |
6
Use equation (3) ρ =
.
to compute the density (and its uncertainty) of aluminum using the measurements of the aluminum block.
| m |
| V |
7
Compute the density (and uncertainty) for the three unknown liquids.
C: Questions
1
Use the values of the densities of the three unknown liquids and information given in the table to determine the identity of the liquids.
2
The sensitivity of a measuring instrument is the value of the smallest quantity that can be read or estimated with it. What is the smallest part of a centimeter that can be read with the meterstick and caliper?
3
What is the sensitivity, in grams, of the triple beam balance?
4
Classify the error types listed in the WebAssign question as to whether they cause random or systematic errors.
5
The volume of a cylinder is calculated using the formula V = π
l.
Which dimension should be more carefully measured, the diameter or the length? Why? Include equations and numerical examples in your explanation.
 |
| d2 |
| 4 |
 |

